

How to make Christmas Cards using Stamps
Christmas cards are something we all enjoy sending and receiving. Often there are many to make and so the wax and stamp combinations in this project can be very useful. The rubber stamps and clear stamps easily create a motif, a visual message, Christmas in this case. The process is not difficult and offers quite a good way to make batches of an idea, yet with each individual result ending up different from all the rest. It uses the same process but gives differing results. That is the magic of Encaustic Art.
Steps
Stamping
- There are 13 images created for cards in this video tutorial. Each one uses a similar process, so the steps listed here are those used in that shared process.
- Using a black dye ink pad, coat the stamp face evenly by pressing onto the pad, ensuring the whole surface is covered and black.
- Print the stamp design onto a piece of white Encaustic Art painting card. First carefully positioning the stamp above the card where you want the image to be. Then gently press into position, being careful not to slip or smudge as you make contact. Hold down in a firm action for a couple of seconds to ensure a good contact and printing. Lift upwards and the print is done.
- For immediate use you can overlay a doubled layer of tissue and then iron with a clean warm iron to instantly dry off the fresh ink. This will remove a little of the darkness of the black, but allows work to continue without any waiting. Alternatively, leave the ink to dry naturally. This gives a stronger and darker result. A good tip is to print a larger number of cards with the stamp image and then leave them all to dry together. After that you can paint without having to wait again at all.
Waxing
The key to successfully seeing the stamp through the wax relies on two things:
– First, choose colours that are reasonably transparent. You can see the entire list of colours we used in these cards further down this page.
– Secondly, use some clear wax on the iron in the area that will pass over the stamped image. Do this for every new stamped card that you begin to apply wax onto. It has the effect of weakening the colours and increasing their transparency.
- Load the iron base (set on LOW), always starting with clear wax. Then add the colours you are using, usually in bands working out toward the edges. The colours are a choice, but often lighter colours are used in the central area and darker colours at the top and bottom of the colour band. This way the “light” is more strongly contained.
- Apply the molten wax colours onto the stamped card, smoothing right over the stamped image. Spread until you like the way the wax looks, especially when it works effectively with the stamped motif.
- Take a moment to consider what would benefit the way the wax colours and stamped image are already working together. Is it best to leave the existing result or perhaps add some decor or a border? Your own unique creativity and taste must have a bearing on how the image is now developed.
Borders
Adding patterns down the edges can work very well to add decoration and create an inbuilt frame for your stamped card. Again, it is really up to your own sense of design and preference as to how you choose to develop borders (or not). Simple lifting off of the pointed end in a series of steps or hops along the card edge can be very effective and pretty. The same multiple lift and place border can be made using the square back edge of the iron. This is more bold and blocky.
Rays
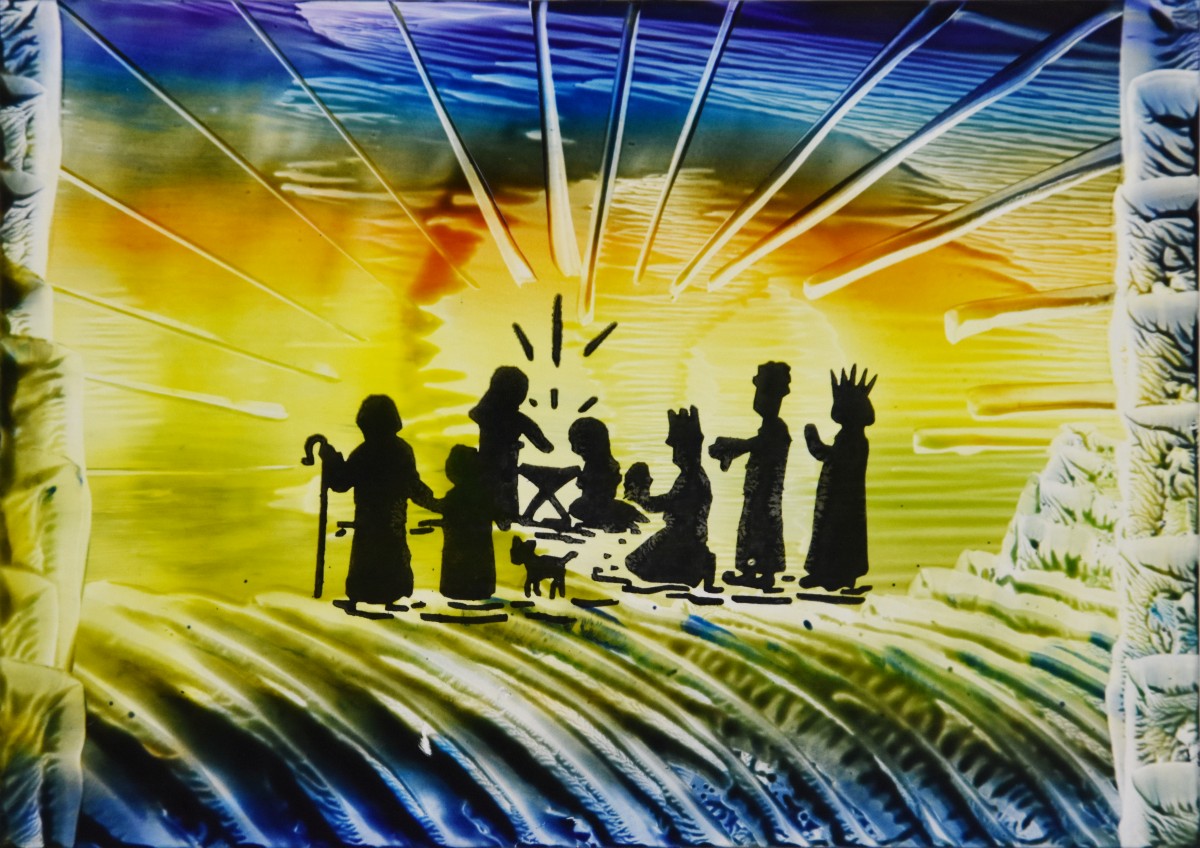
In the video you will see rays created just by touching the iron’s edge down, then lifting off again. This creates a thin line. Make them an angled array for a radiant effect.
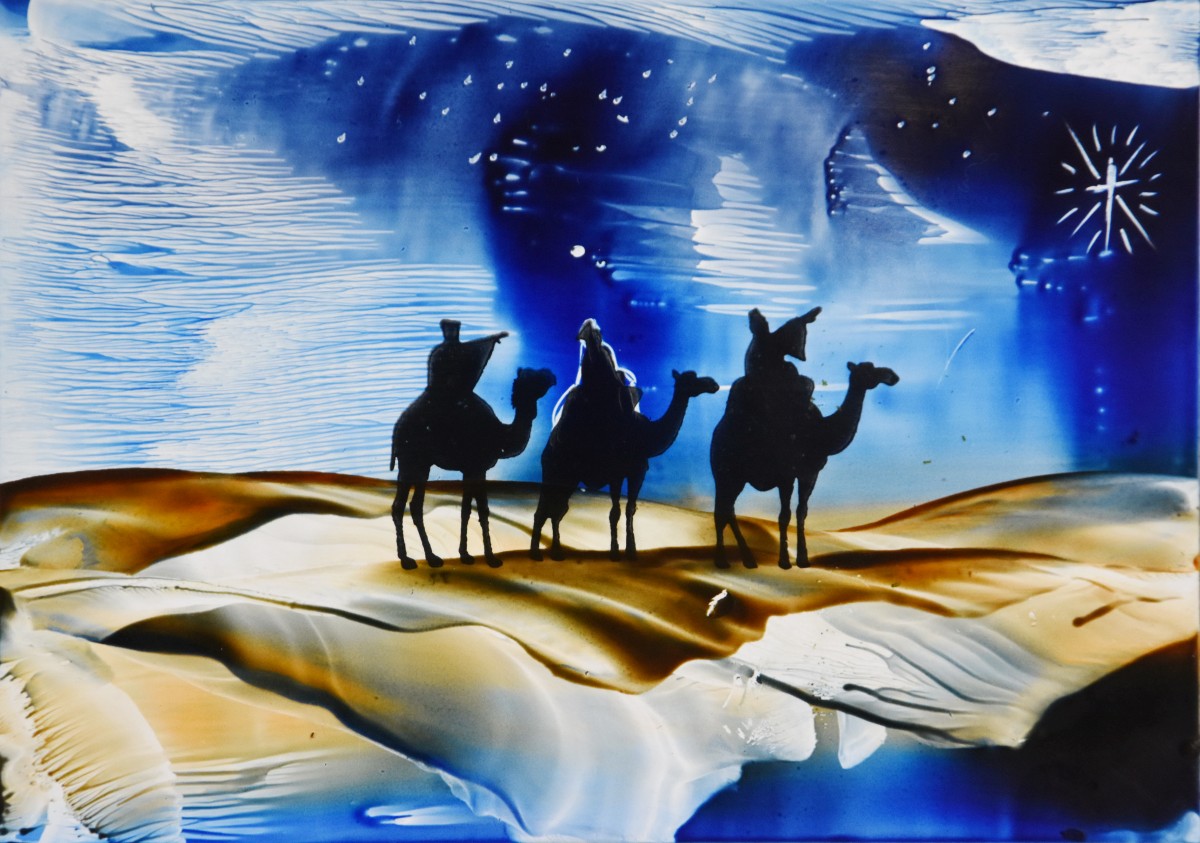
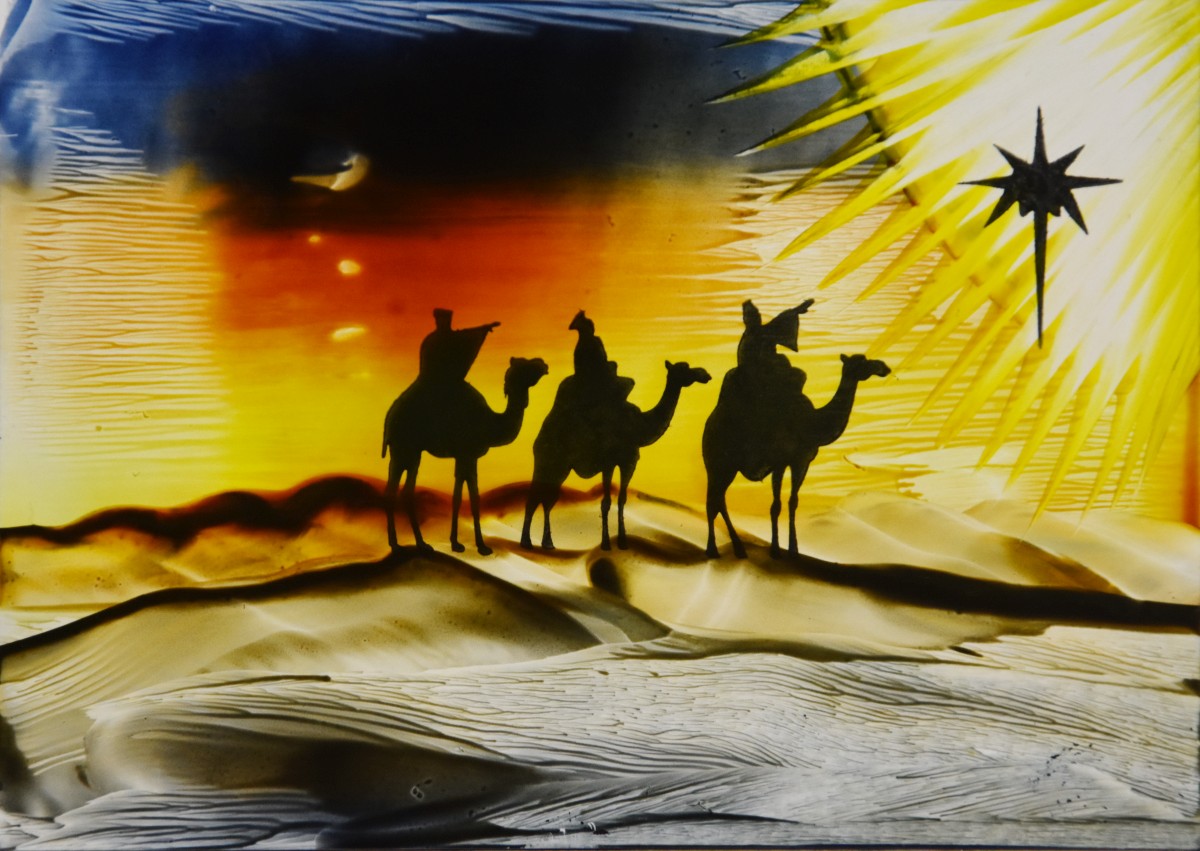
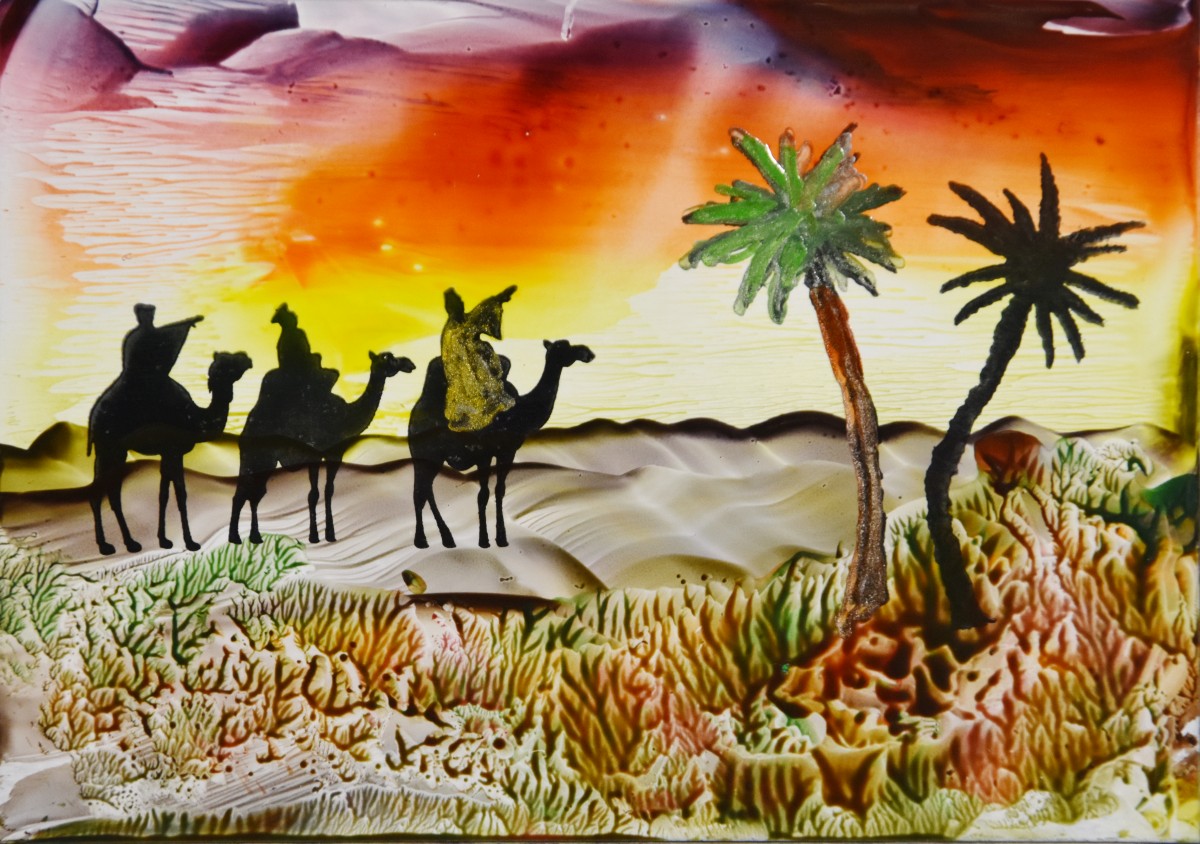
The Wise Men pointing to the stamped star uses a different ray effect where the clean wax colour is applied and then the iron edge is “sawed” back and forth through that wax, rotating to result in a feeling of light shining from that corner.
Metal Scriber
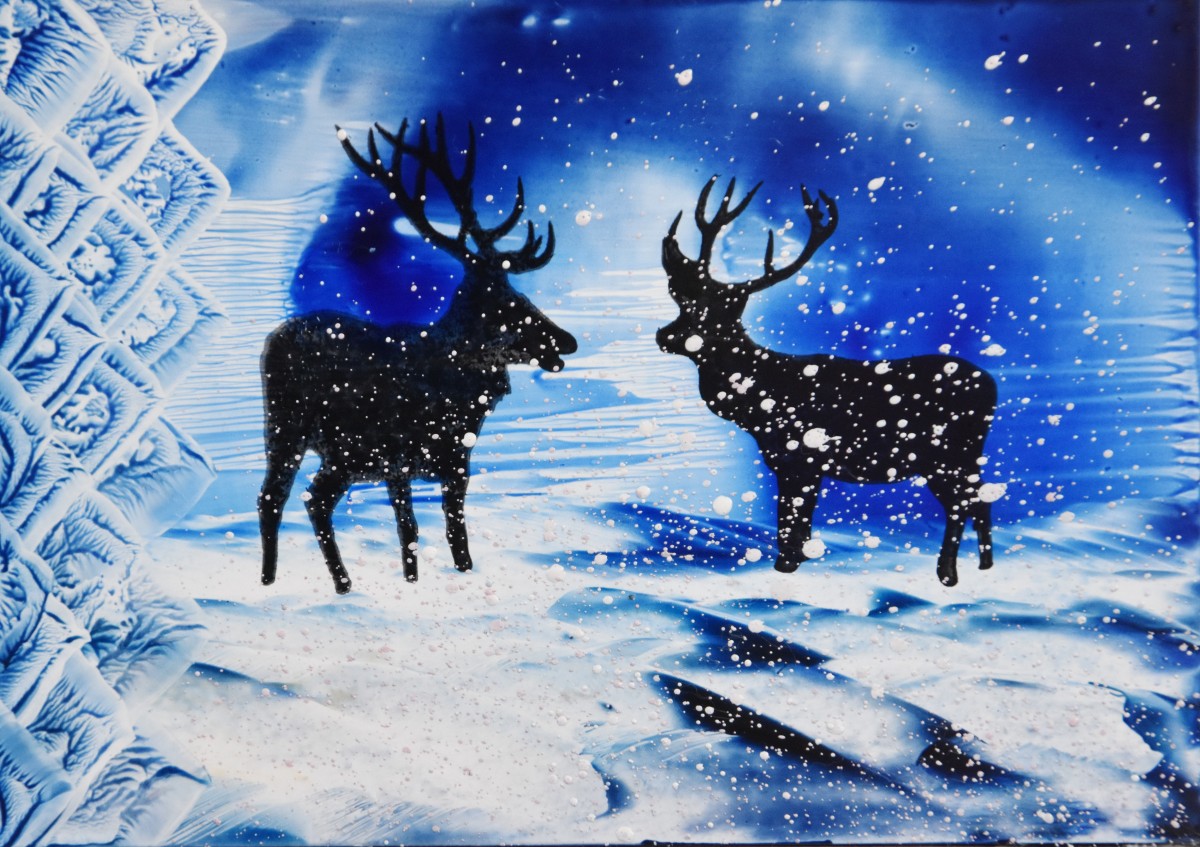
The metal scribing tool can be used effectively to remove wax from the white card. Ideal for small “star” spots. Make these by tapping the scriber onto the card. Take care not to hit too hard and try not to skid on contact otherwise the star spots turn into short lines!
A more careful scraper action can be used to create bigger stars and also to highlight around an area of a stamp that has got “lost” into a dark background (as in one of the Wise Men images).
Stylus Details
Whether you use the older stylus or the more evolved and modern Stylus Pro tool, they bring you the ability to add graphical details with ease. Just using the drawing tip, you can add lines, spots, decoration, over-colouring of the black stamp images with coloured waxes (note: when over-painting use opaque colours to hide the underlying black ink – mix in some white wax).
Stamp Design Considerations
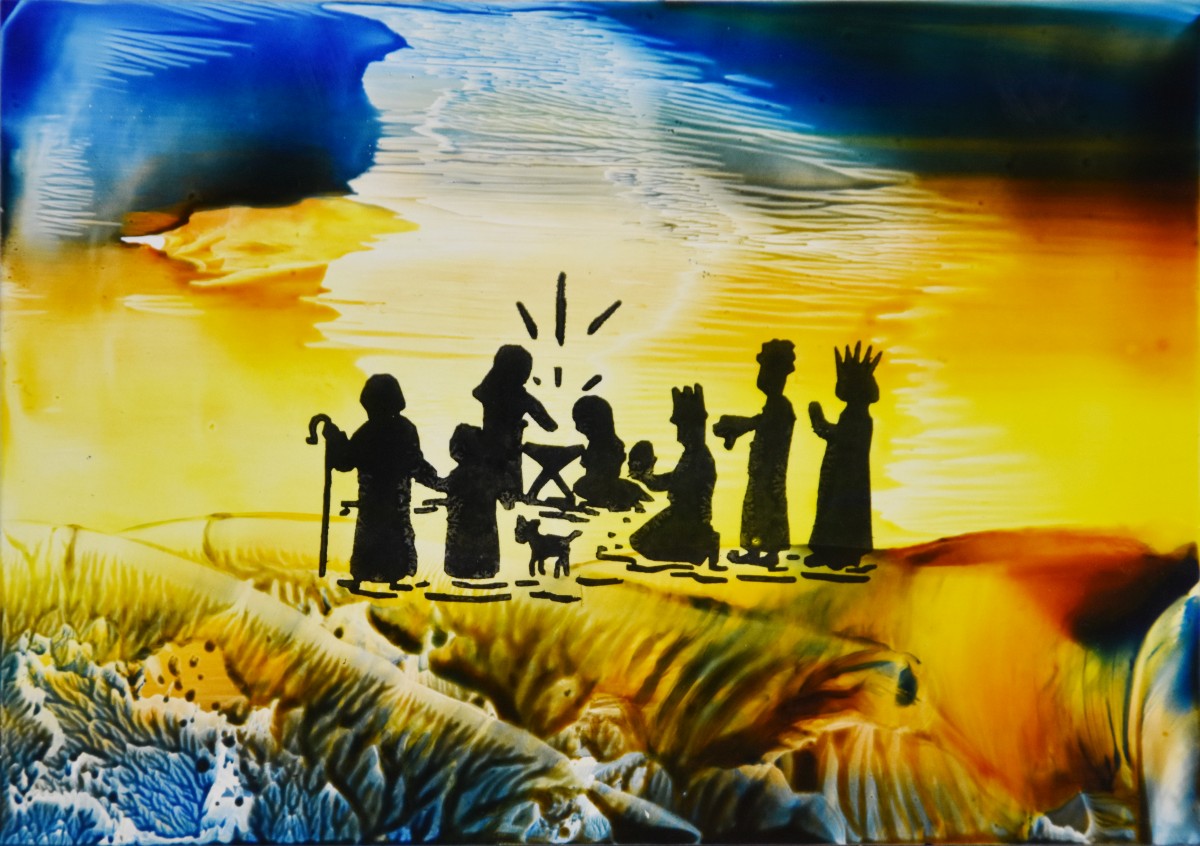
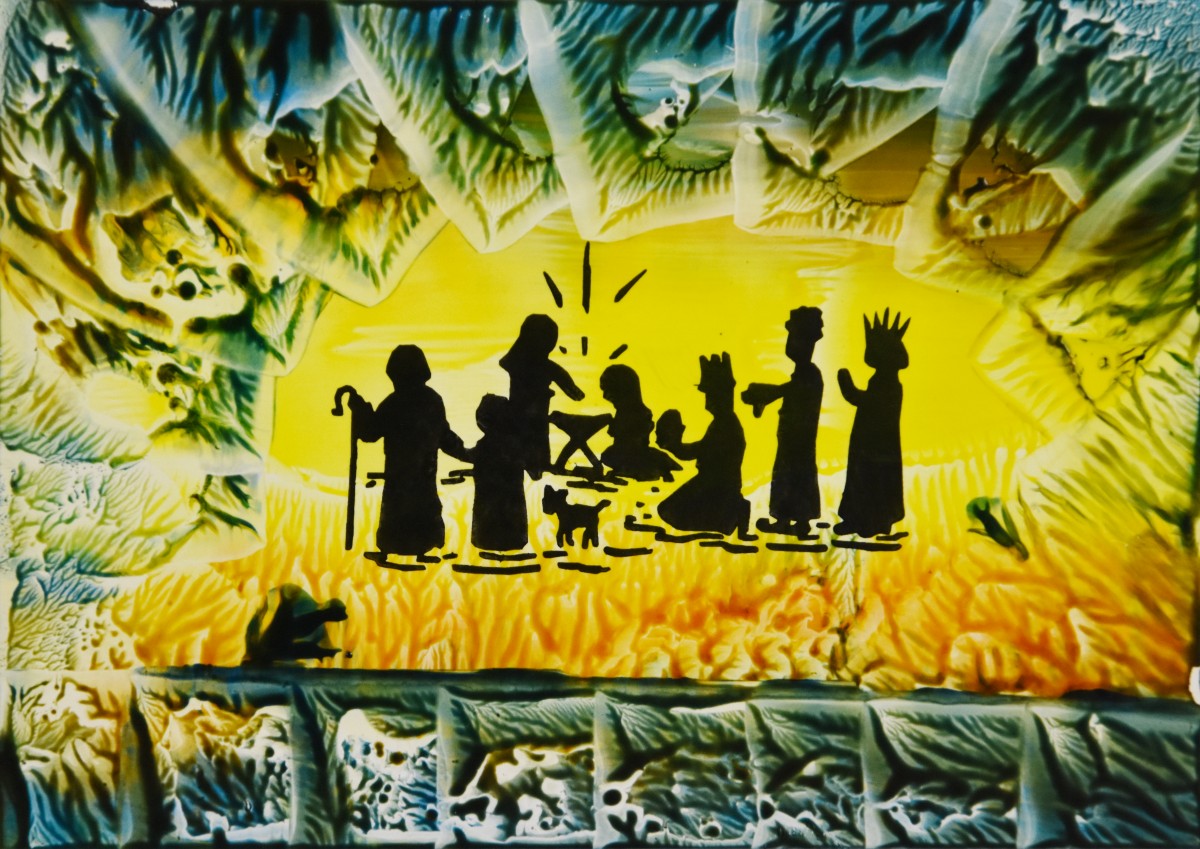
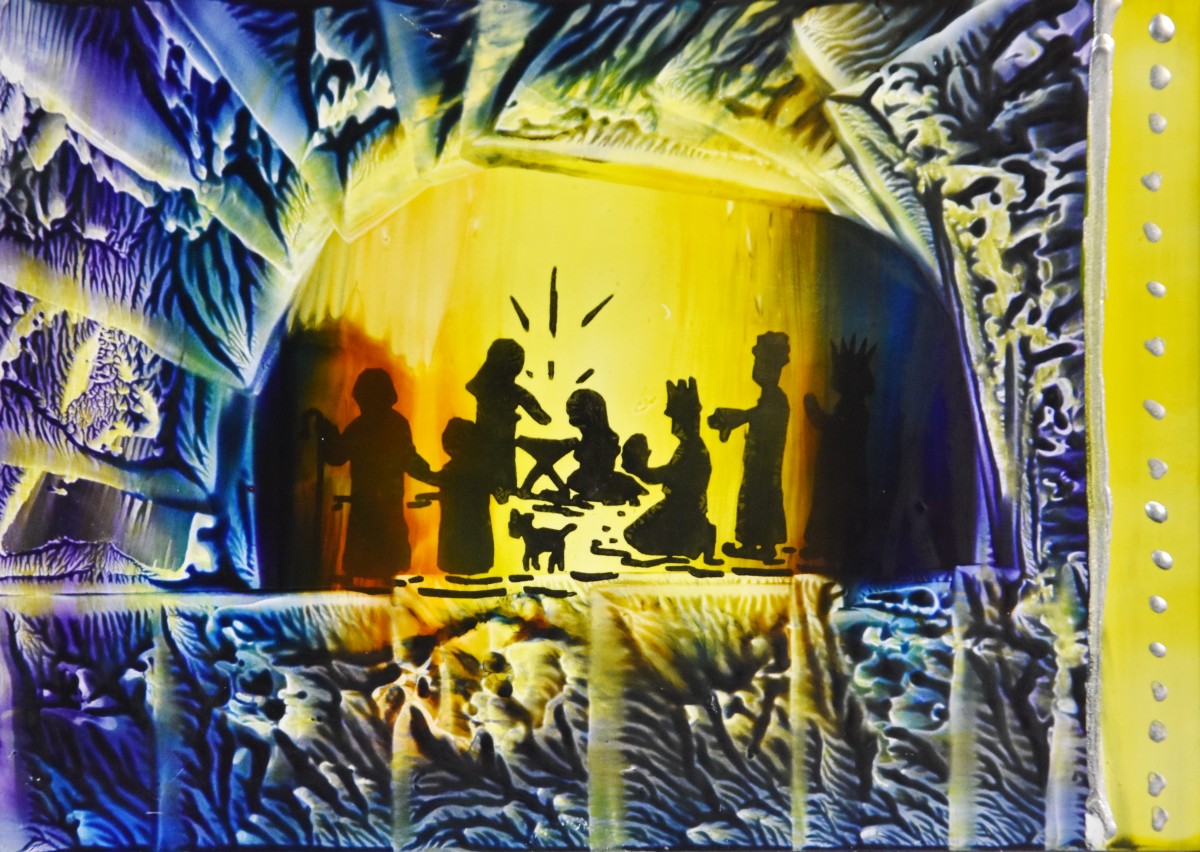
- Nativity (Art. 99550026) : The scene needs to feel grounded and it’s characters need something to stand upon! Using yellow behind gives a strong illumination. Containment in a “stable” fits Christmas stories.
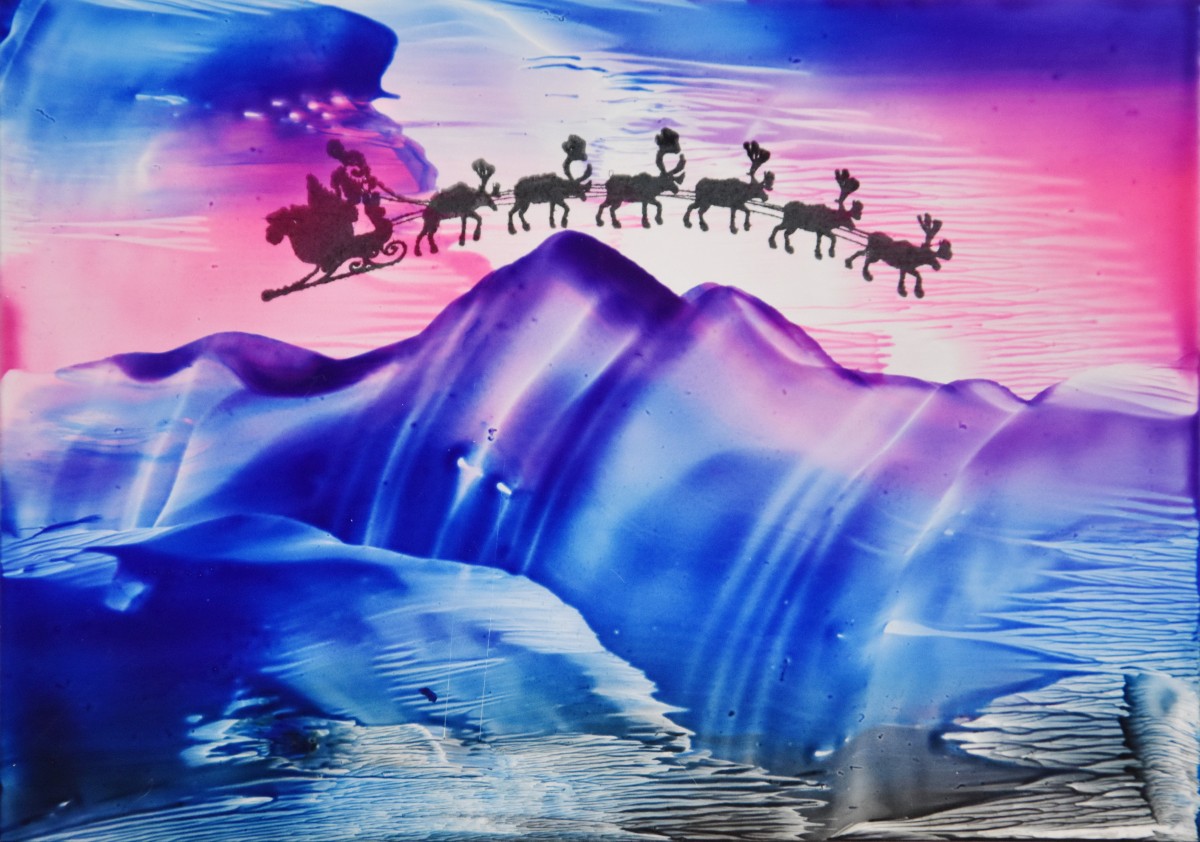
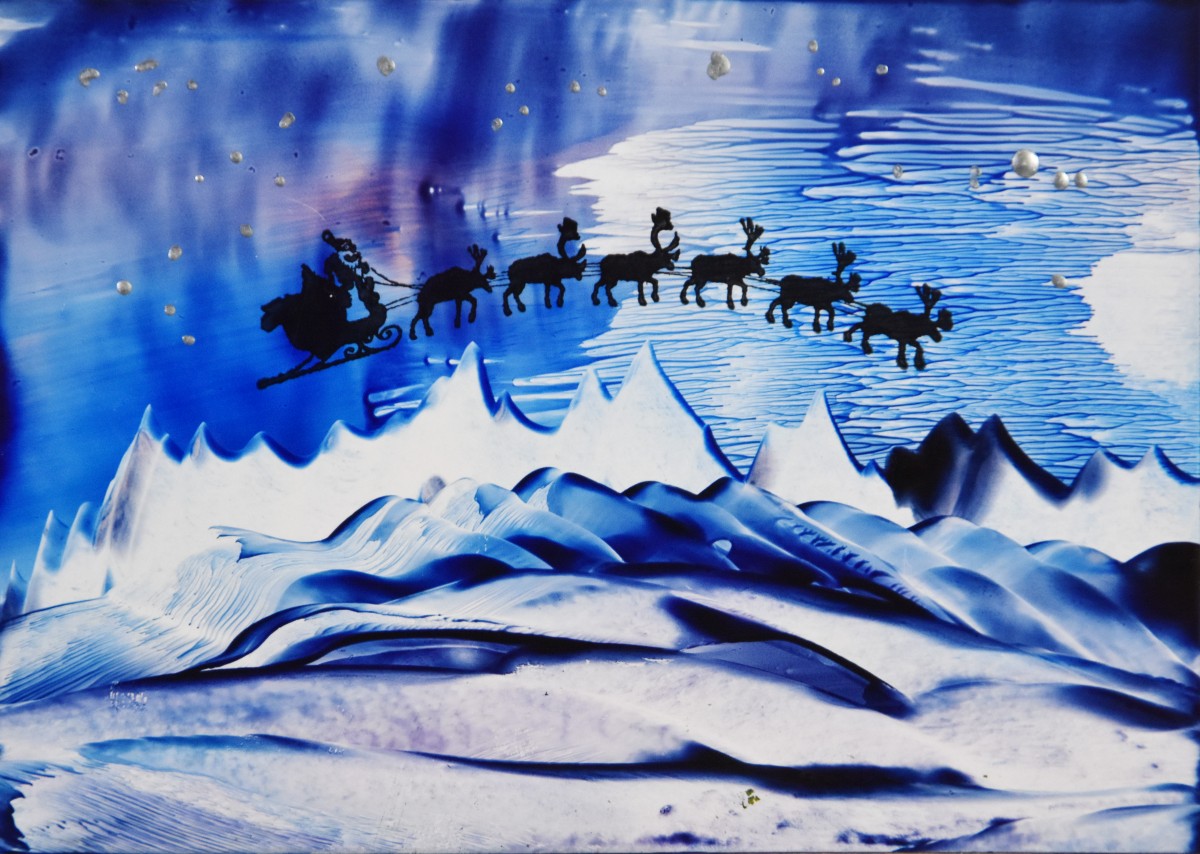
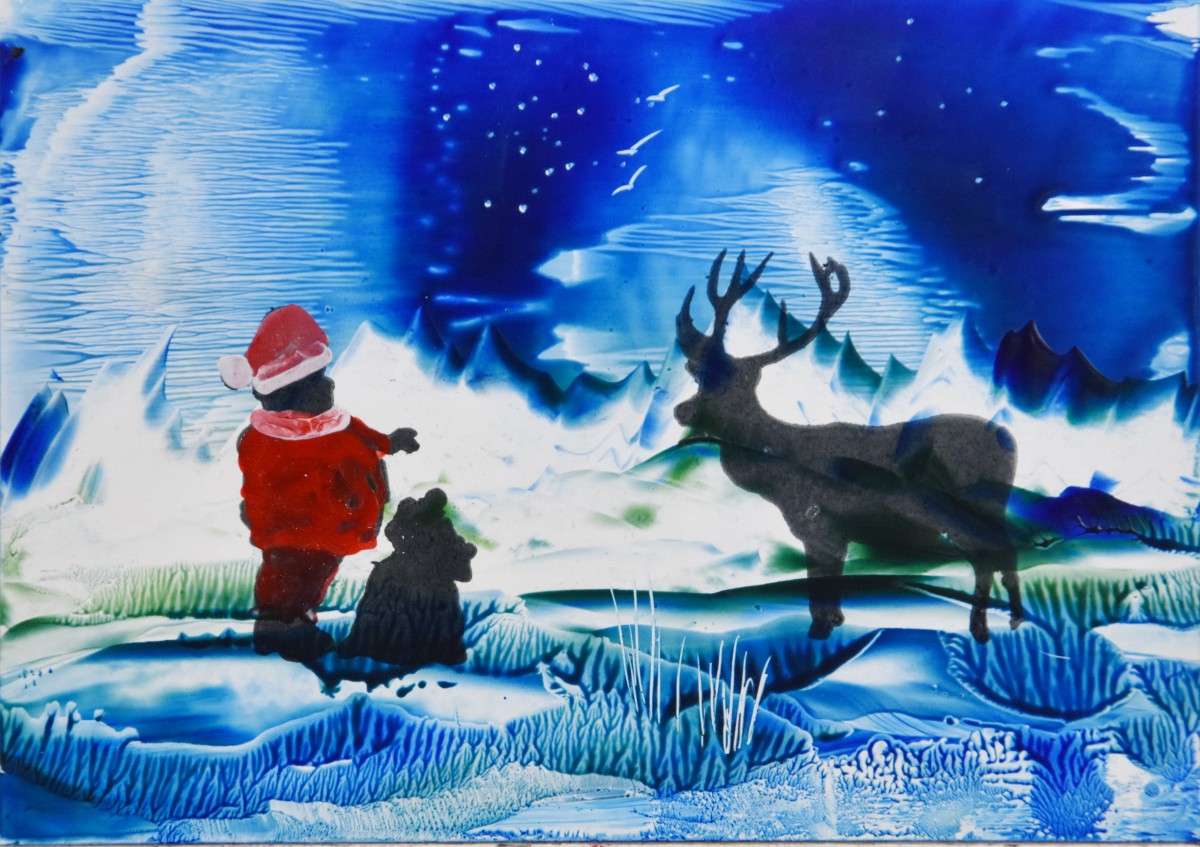
- Sleigh (Art. 99550027) : Santa’s sleigh flies in the sky, so is an easy image to use. Flying over mountains or house tops works well.
- Wise Men (Art. 99550016) : They are travellers following a light in the sky. Camels must have their feet on something solid!
- Palms (Art. 99550010) : Work well with the Wise Men. The clear polymer palm can have its skinny trunk bent into various forms.
- Holiday Season (Art. 99550303) : The clear stamp have the advantage of being easier to place with great accuracy because you can see through the transparent stamp block. Although not shown in the video, this quality makes the clear stamps great for multi-stamp patterns.
- Encaustic Art Clear Stamp Set Nature : (Art. 99550302) : The clear polymer palm can have its skinny trunk bent into various forms. Other stamps in this set share that same quality – the polymer is bendy!
Products Used
- Encaustic Art Painting Iron (EU plug: Art.99530100) (BS-UK plug: Art.99530102)
- Encaustic Art A6 painting card (Art. 99537100)
- Encaustic Art Metal Scribing Tool (Art. 99531015)
- Encaustic Art Wax blocks
- Leaf Green (Art. 99534906)
- Yellow Brown(Art. 99534914)
- Black (Art. 99534915)
- White (Art. 99534916) * this turns any translucent colour into an opaque tint.
- Gold (Art. 99534925)
- Silver (Art. 99534926)
- Clear Wax Medium (Art. 99534927) * the most important ingredient because this clear wax acts to increase transparency and make the colours more “see-through”.
- Neon Pink (Art. 99534937)
- Bright Red (Art. 99534943)
- Mid Yellow (Art. 99534944)
- Cyan Blue (Art. 99534946)
- Sap Green (Art. 99534945)
- Indigo (Art. 99534947)
- Purple (Art. 99534948)
- Encaustic Art Rubber Stamp : Nativity (Art. 99550026)
- Encaustic Art Rubber Stamp : Sleigh (Art. 99550027)
- Encaustic Art Rubber Stamp : Wise Men (Art. 99550016)
- Encaustic Art Rubber Stamp : Palms (Art. 99550010)
- Encaustic Art Clear Stamp Set : Holiday Season (Art. 99550303)
- Encaustic Art Clear Stamp Set : Nature (Art. 9955030)
- Block – Round Ø 7cm (Art. 99550350)
- Stamp Pad Black (Art. 99551001)
- Tissues from the local grocery – large size double ply tissues are ideal.